You are here
A French Hat
I was looking for a hat to suit my blue & orange outfit, and had already decided to make one using leftover orange cotton velvet from the forepart and sleeves. Initially, I was thinking of making more of an English style hat. However, surfing through my hat images, I was reminded of this French one - which is of a period and style very fitting with the rest of the outfit.
Wanting to make this particular style meant that I couldn't use a cheap bought base for it, since none would be available in the right shape and size. This was fine anyway, as I've been wanting to try blocking my own hats for a while. I already had a hat block in the correct size and shape for this hat, so just had to buy a commercially manufactured felt hood to block. At some point, I would also like to try making my own felt and blocking with this.
A bit about my background research.
I haven't done very much research into period hatmaking. I don't think there's a lot of written material available on it (references welcome! Email me at dragonfish dot dance at gmail dot com if you know of any!). There's not even that many surviving images of hatmakers, or hats, as far as I am aware in these early days of looking at hats (again references welcome!).
The few images available of period hatmakers I have come across on Karen Larsdatter's site - this one here is the only image I have seen of hatmakers actually working on shaping hat bases. It looks like the chap on the left is working to felt the basic hood shape - how the stick comes into this I'm not entirely sure, but maybe he's using it to manipulate the fibres. The chap on the right appears to be in the process of actually blocking a hat, with a large barrel of water - possibly with a hood soaking in it - to his right. The central figure is trimming up a blocked hat. The only image of a hatmaker finishing a hat is this one, where it looks as though he is perhaps stitching the brim into place.
I won't discuss flat knitted felted caps here, as the evidence for them is exhaustive and it's not the style of hat I'm making here. However, there are several examples of surviving shaped hats that have been knitted and felted - most notably these ones from the National Museum of Denmark. There are also several surviving examples of hats made simply of felted wool that has been blocked - these Irish ones, and this workman's one. The latter two links are of lower class hats, but it's plausible that the image of the hatmaker finishing a hat is showing him finishing these plainer hats, either knitted and felted or just felted, rather than working on upper class hats. Fortunately Janet Arnold includes several examples of upper class hats that have been made using a felt base and then covered (pp31-33, 93-941).
The process.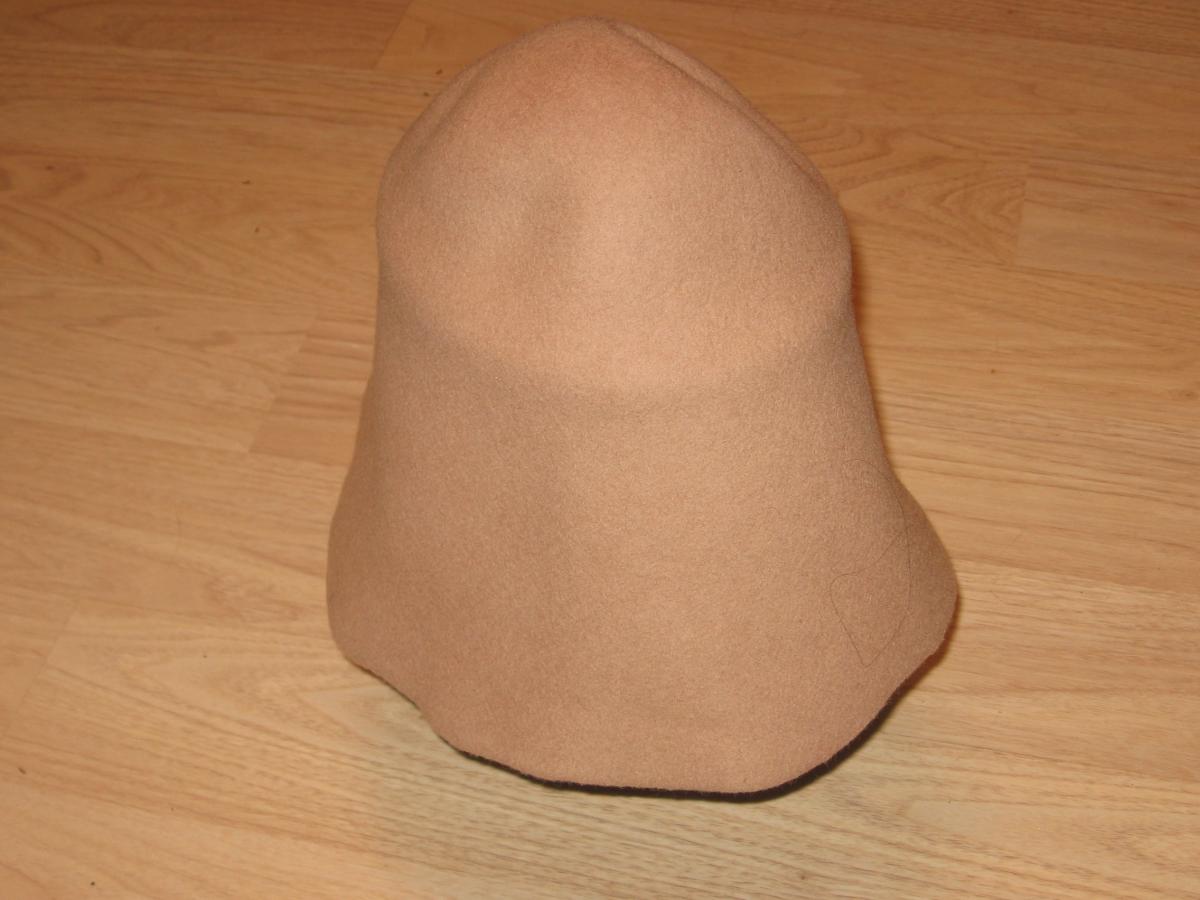
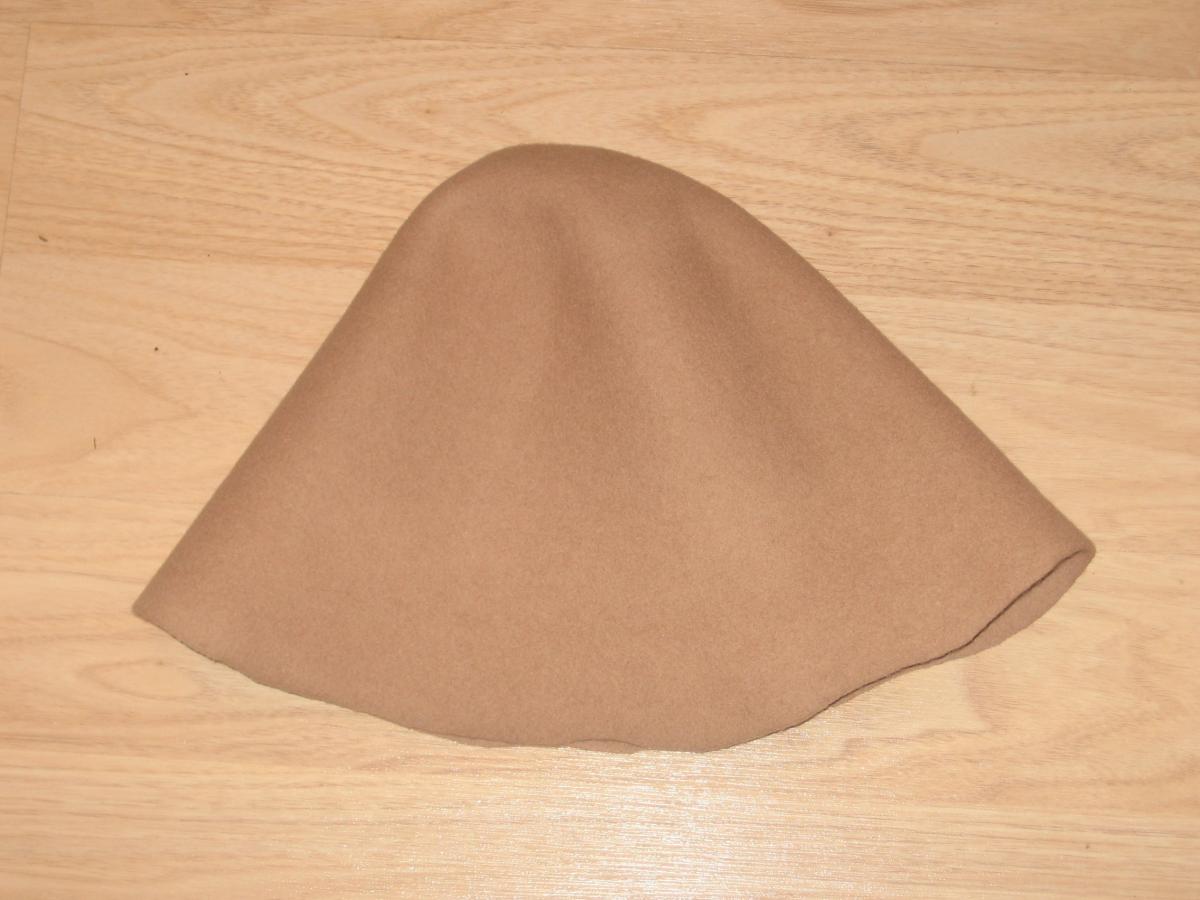
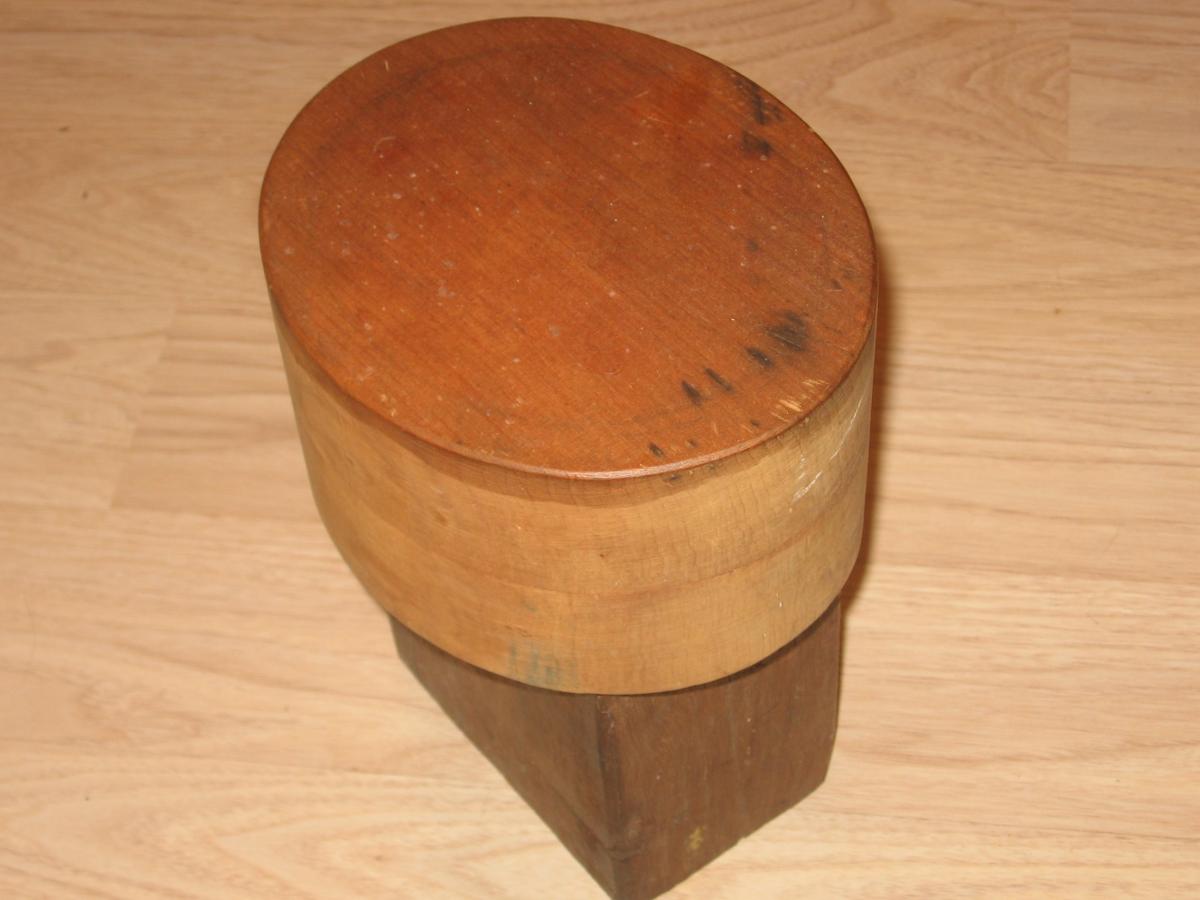
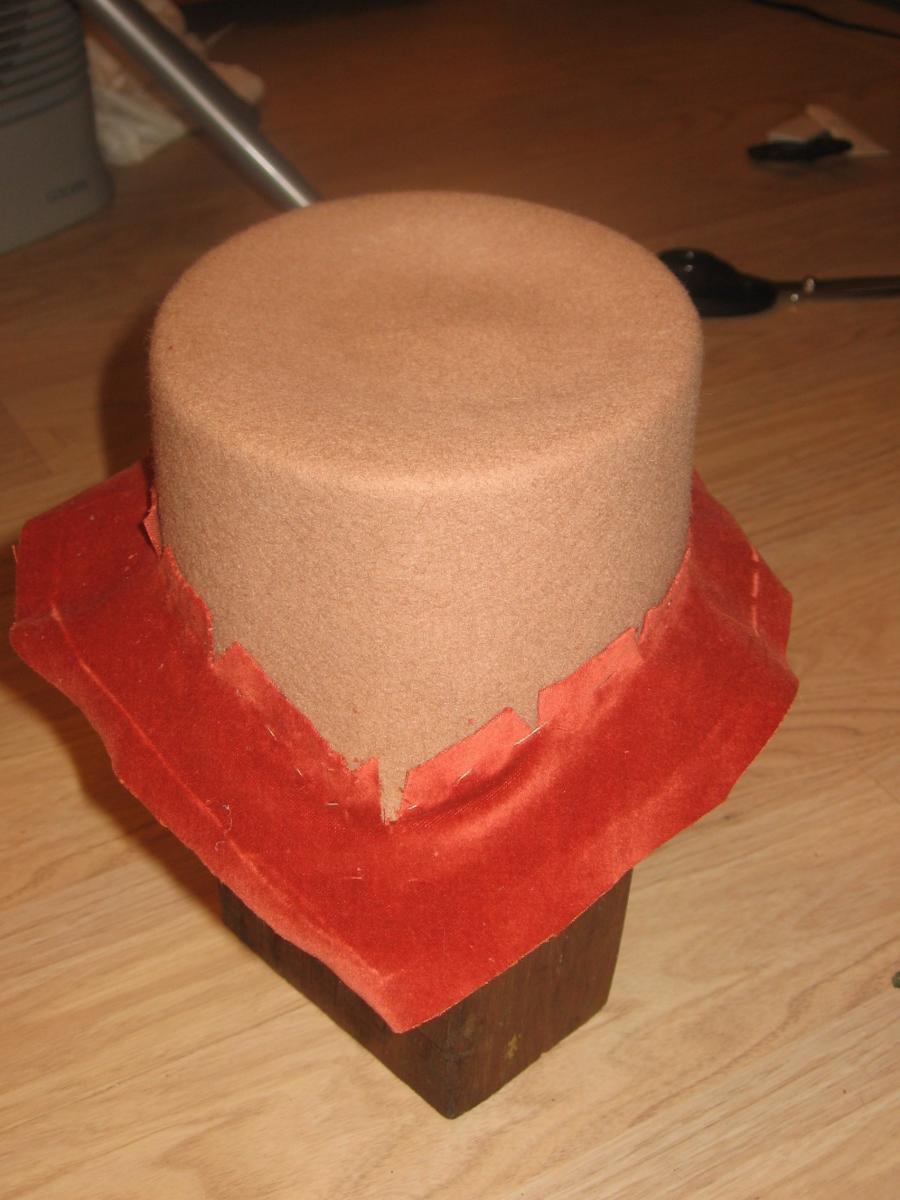
I started out with a commercial felt hood in beige, as I was intending to fully cover the felt base. I already had my hat block, which is a small oval, 49cm round and 9cm deep. I then demonstrated the principle that a dry hood will not conform to the hat block shape, purely to demonstrate the principle (I already knew well enough that this would not work). The far right hand image shows my demonstration. Felt is a fairly flexible substance and will stretch to a certain degree, but won't retain a shape the same way as if it is made to conform to that shape when wet.
From here, I soak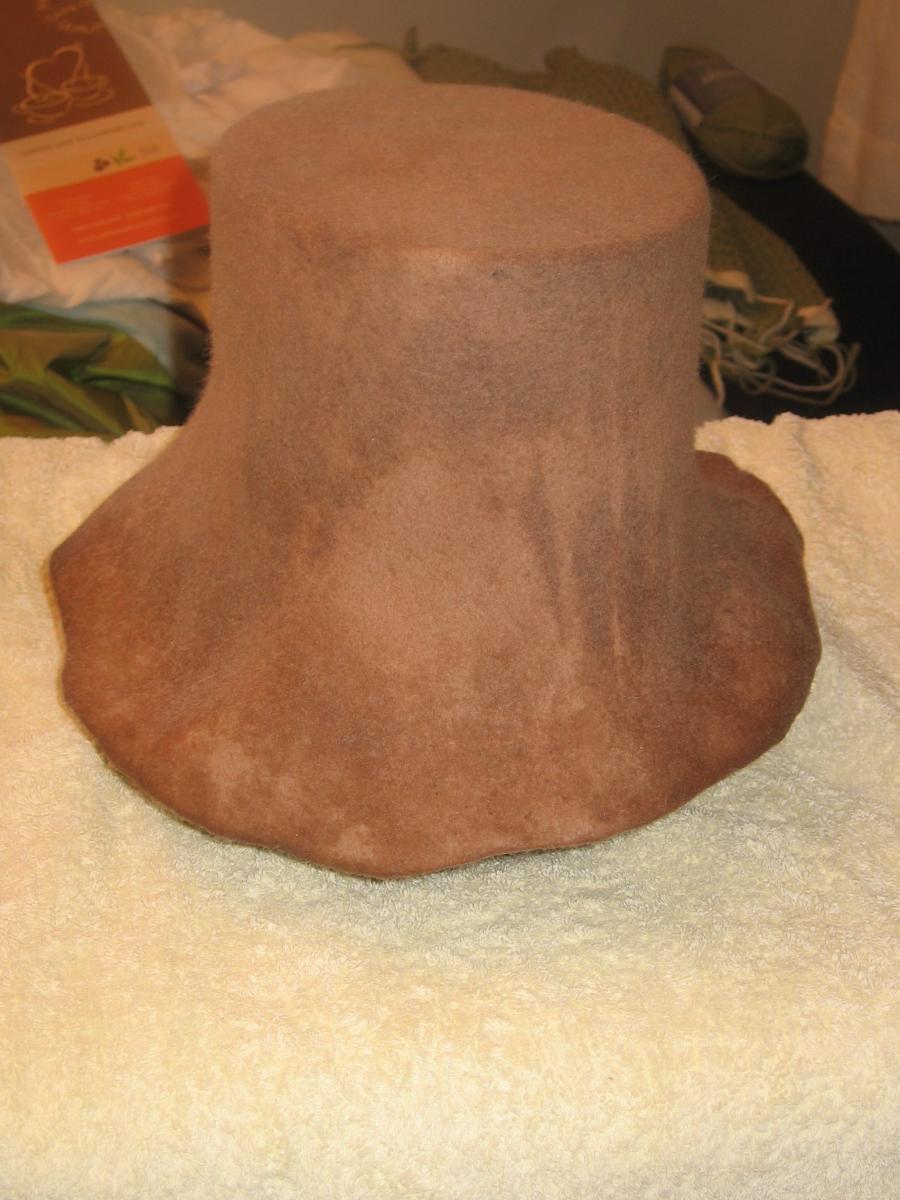 ed the hood in hot water. This is actually quite hard to do, as the felt is fairly water-resilient. Still, after a few minutes it was fairly well wet. I then slipped the wet form onto the block and gave it a bit of a tug until it flattened over the top, taking care to tug evenly and from opposite sides all the way around so that the result was (fairly) even. This took no great deal of effort, and about a minute of time, which greatly surprised me - I had expected it to be slightly harder work, and for it to take longer. I gave the hood a good iron using my normal household iron with a fair amount of steam, to further encourage the top to take the shape by applying pressure and steam to the top, and also all the way around the side of the block.
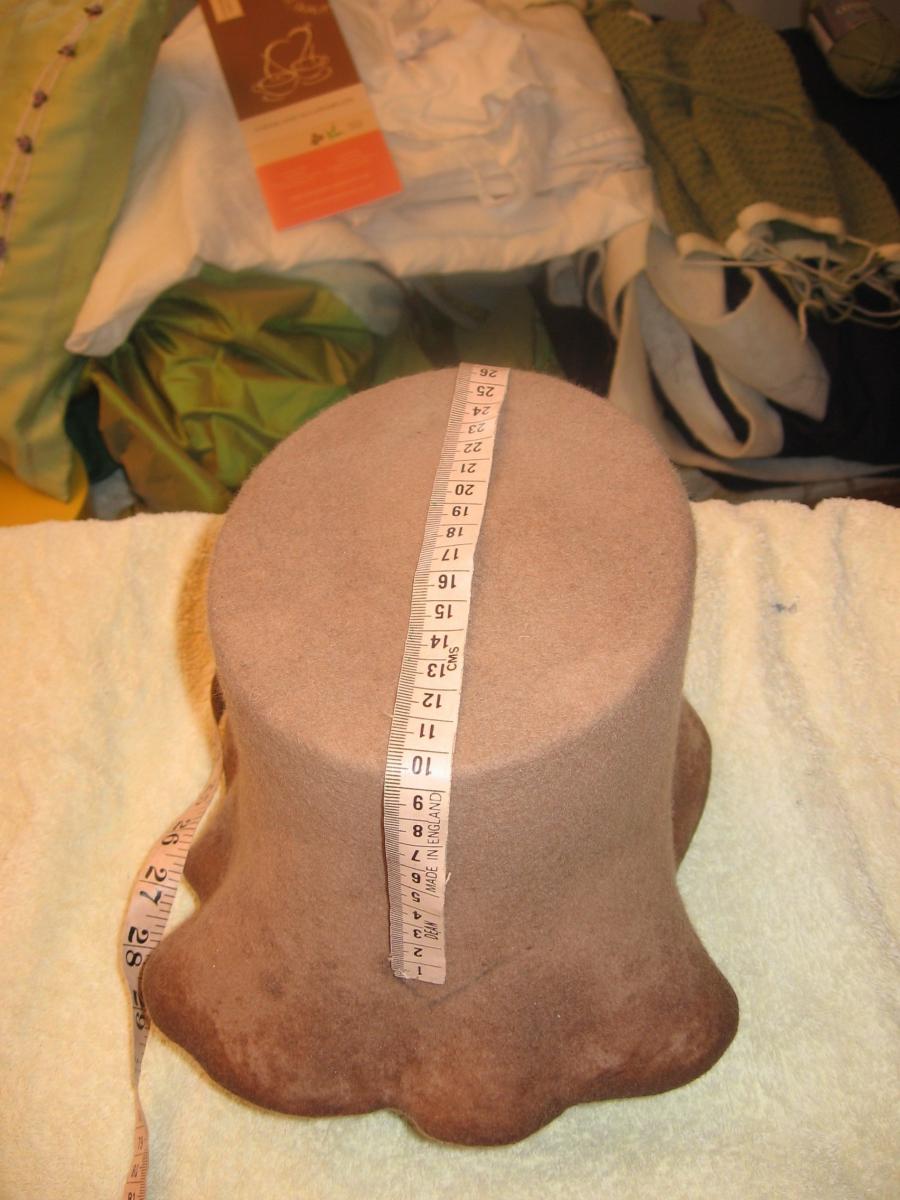 From here, I began the process of shaping the hood. As you can see in the image on the right, I used a measuring tape to help keep the line from centre front to centre back actually centred; I also used this for the centre sides. I'll make some more comments about measuring later. You'll also be able to see some pencil lines on the hood, as I started to draw in the actual shape that I wanted to create for the brim. I wasn't worried about leaving pencil marks, as the entire hat was going to be covered over anyway.
Once I'd measured those points, I drew the brim outline all the way around with a pencil, adjusting it by eye until I was happy with it. Then I measured a few centimetres more further down, to create the brim. I then cut away the excess hood material, and made judicious use of the iron on steam setting - and with a lot of puffs of steam - to encourage the brim to take the shape that I wanted. This actually turned out to be really easy and only took about five minutes. From a bit of online research, it turns out that you can buy special blocks for shaping brims. However, I managed to get a perfectly adequate result without one of these. I went around t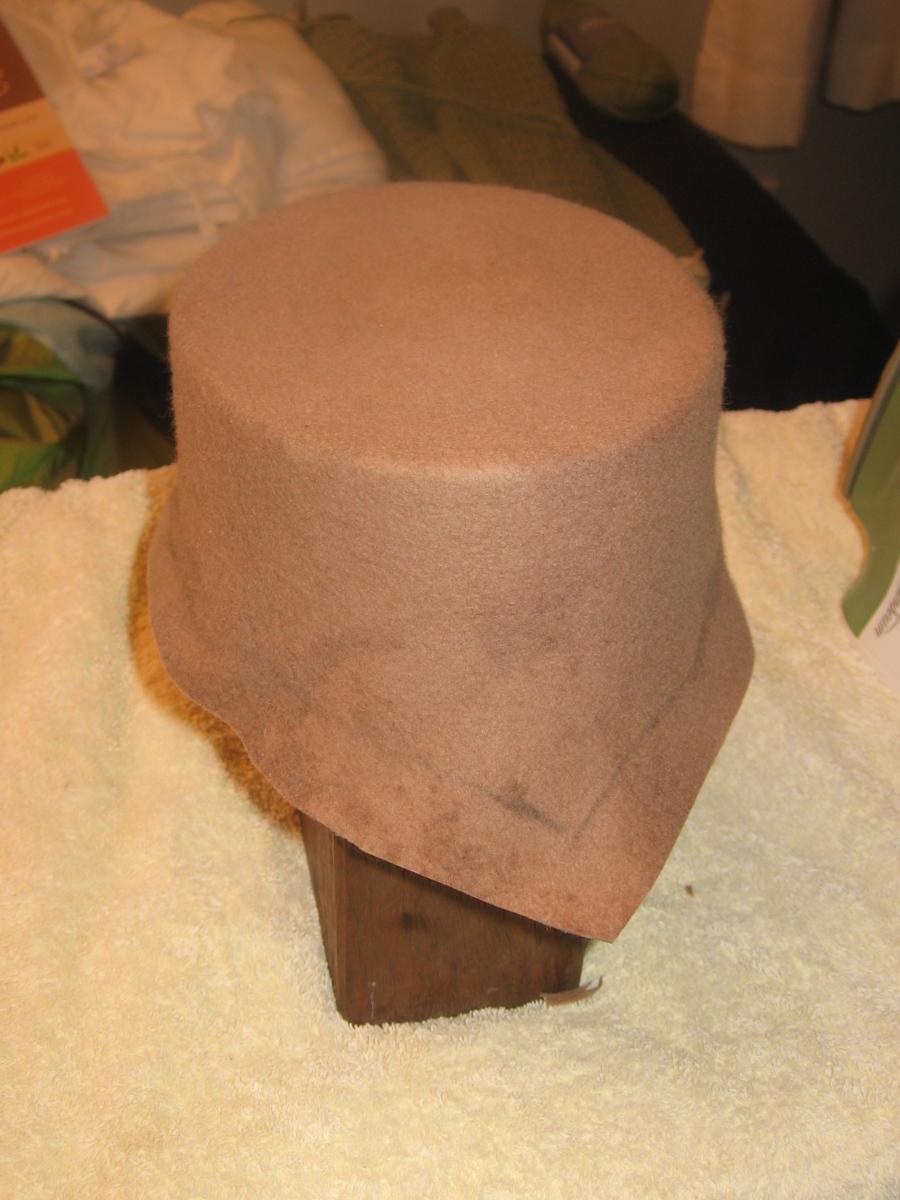 he base
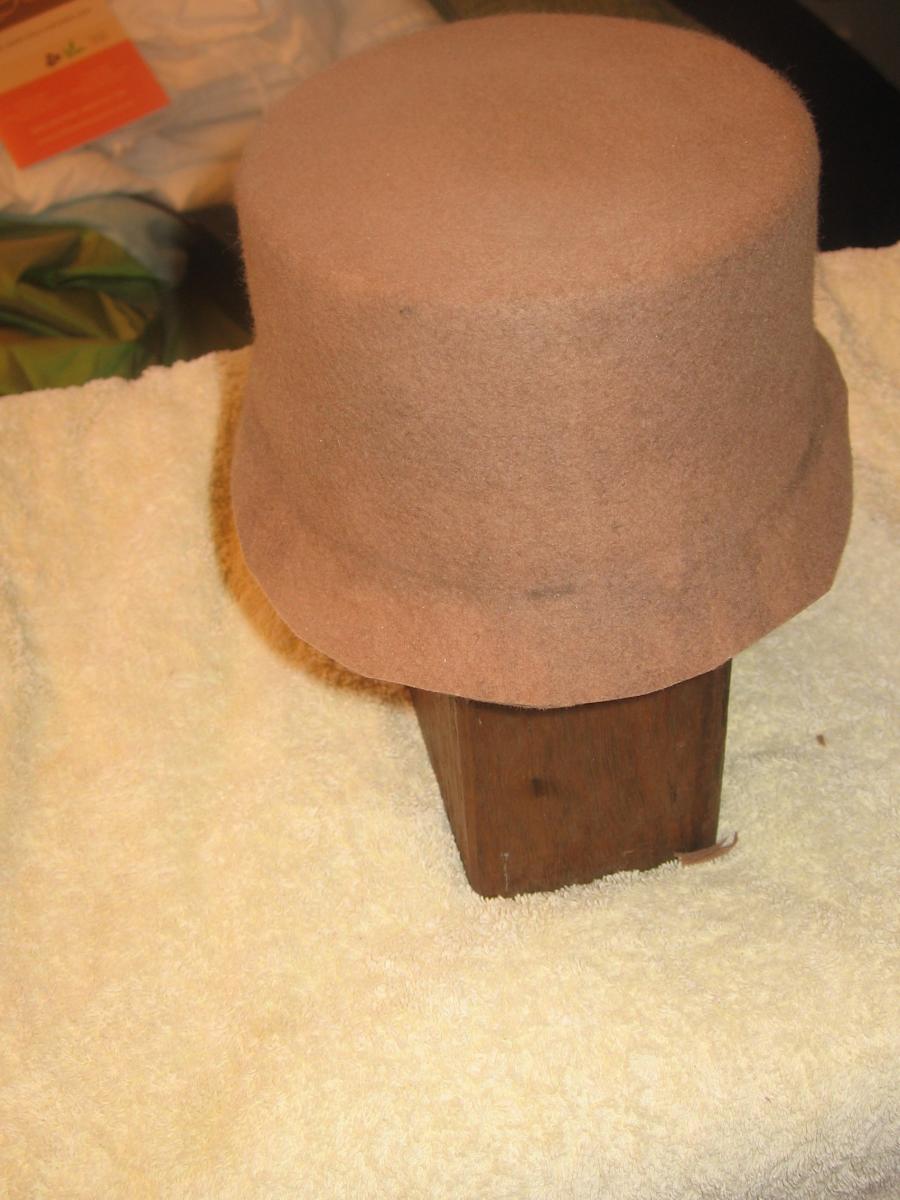 of the hat with the stea
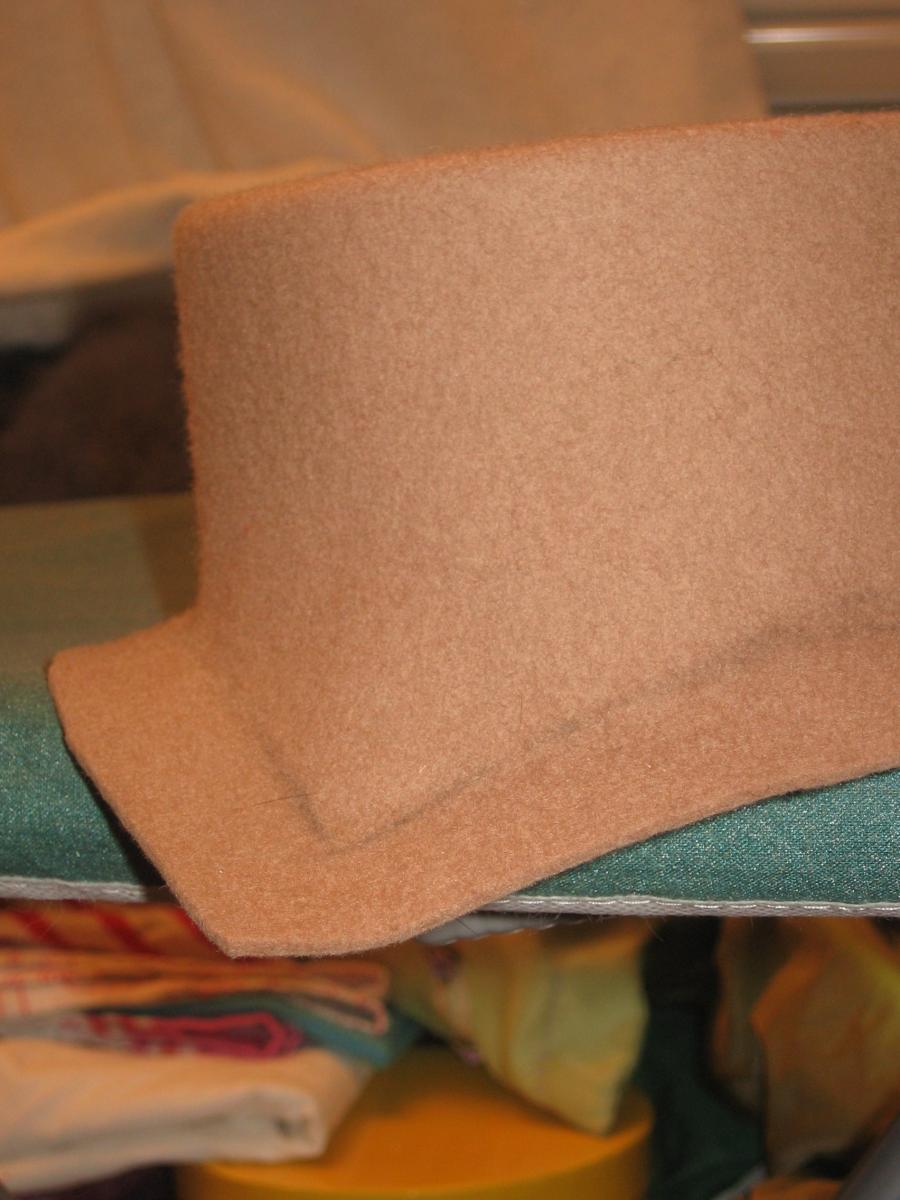 m iron, folding the brim up so that where I wanted it to crease it met the metal edge of the iron. I then also went around the underside of the brim with the iron, folding it up as fully as I could along the crease line. I repeated that process several times to make sure the shape stuck. I had intended to wear my leather fencing gloves while I was doing this, to avoid burning my fingers, however I'd misplaced them. I'm pleased to report though that I managed the entire process without burning myself, which would suggest that most people could safely and satisfactorily achieve this themselves. The images above on the left show you the finished blocked shape, prior to drying.
The drying process was by far the longest and most boring bit of the whole thing. Also the bit most designed to test my patience. I kept checking every 15 minutes to see if it was dry yet, even though I knew it would take about a day. In the end, I went out for three hours then came home and sat it in front of the heater. I don't know if this is kosher for hat making or not, but it seemed to work and meant I could start decorating that evening, so I was a much happier camper.
 The first step was to cut the brim in the fabric I was covering it with. I cut both upper and lower brim at the same time, but only put the upper brim on at this stage. The process was almost identical to the one I used for my teeny tiny hats. To do this, I snipped little darts into the fabric so that it would sit smoothly over the upper hat. Once I was satisfied with how it was sitting on the hat, I stitched the tabs in place using a thread that blended well with both the wool hood and the velvet.
Next, I needed to cover the top of the hat. As you can see in the image of the hat that I was copying, the fabric drapes in a slightly wrinkled fashion. This is quite common in images of period hats, and I think that it was caused by circles of fabric being draped over the hat, and then drawn in to fit using gathering stitches to create pleats.
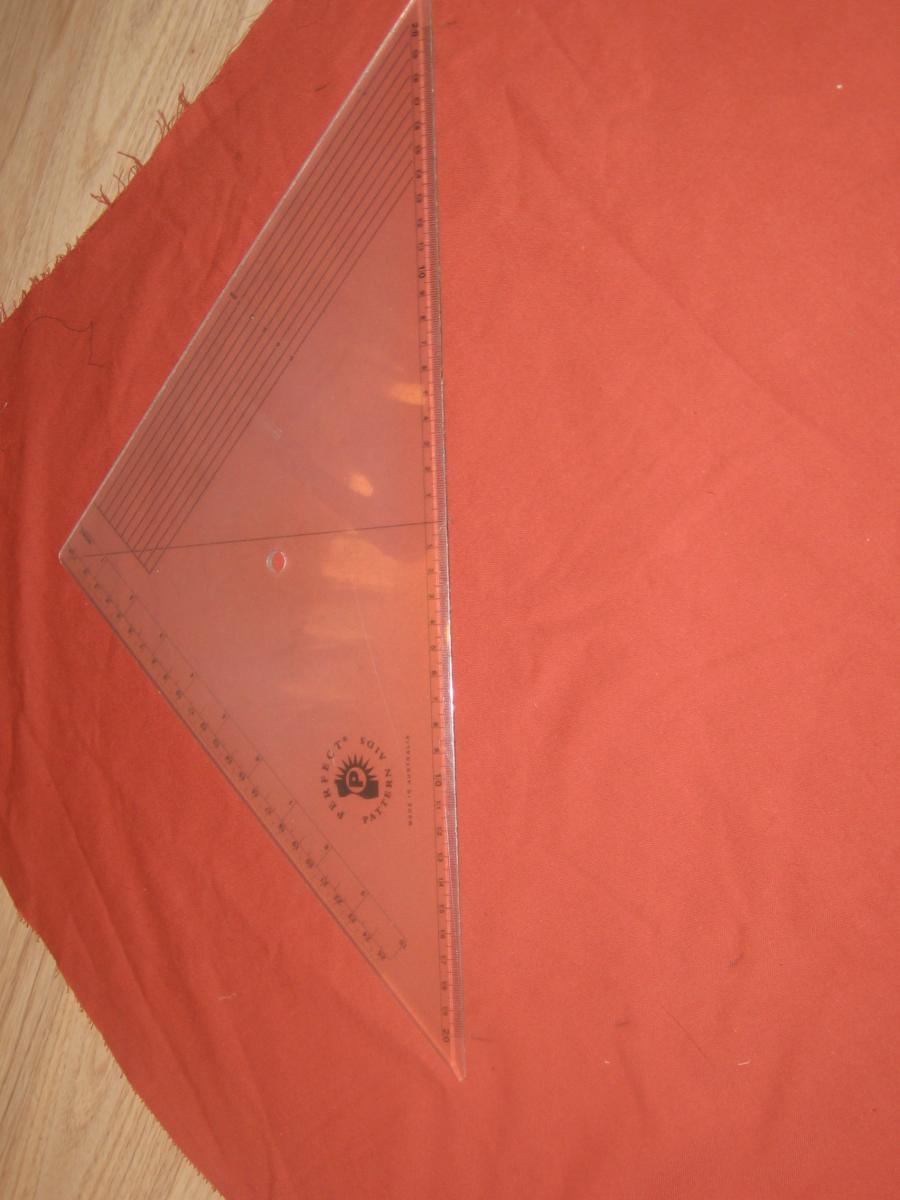 As my hat was an oval, rather than a circle, in shape, I used the longer diameter to draw my circle. I then made cunning use of my patchworking/quilting set square to draw the circle, rotating the extremities around the centre point and drawing the measurements in accordingly. You can do the same thing using a tape measure or metal ruler, the beauty of the set square is just that it measures 20cm in either direction from the centre so you don't have to do any maths to figure out where the points should be.
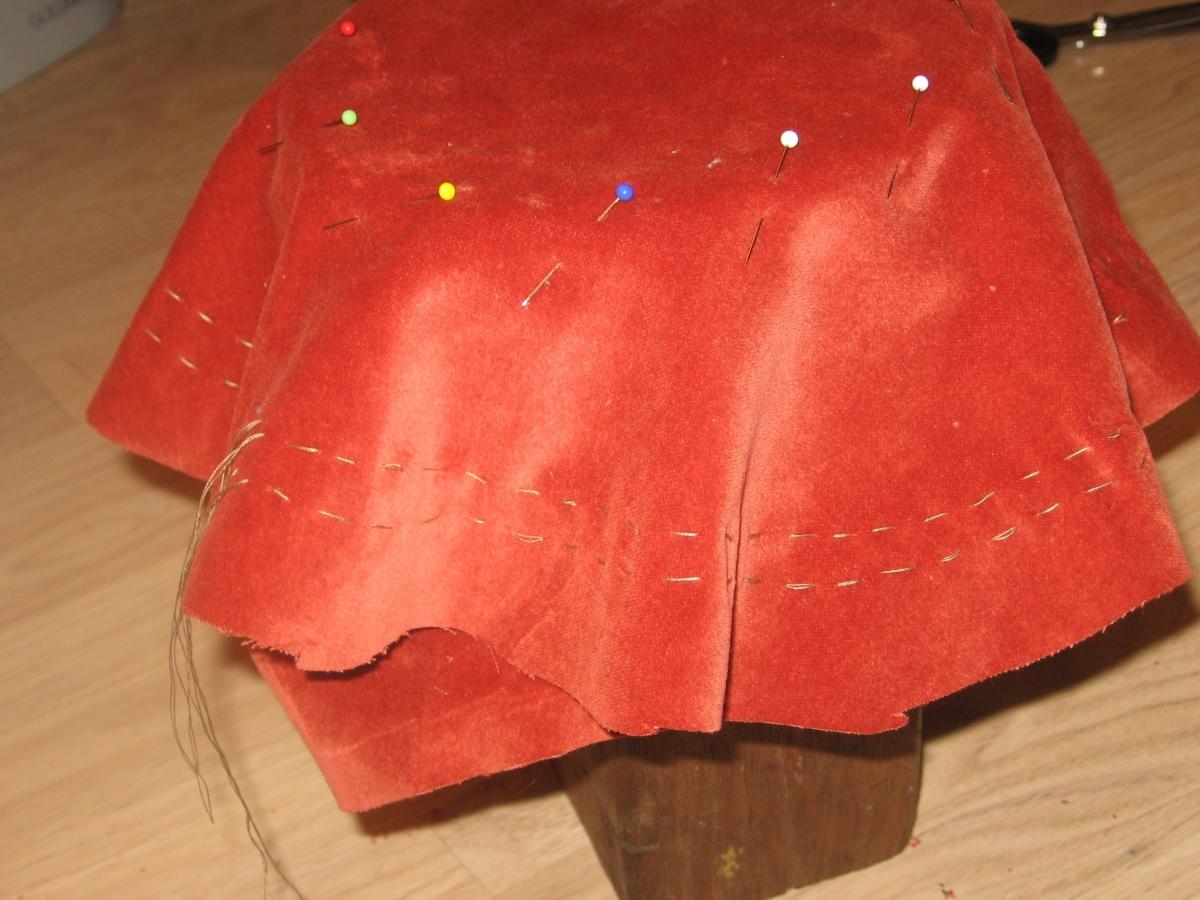
 From here, I draped the cut circle over the hat, readjusting the position of it until I was satisfied that it was even. Once I was happy with that, I pinned it in place. The circle was ultimately much larger than I needed it to be, as I was working with an oval but had calculated a circle to the oval's largest diameter. I decided to leave the circle whole though while I ran a couple of lines of gathering threads around it, near where the edge was going to end up. The trick with creating even gathers is to do the gathers by hand, and to ensure that the stitches line up with one another, from one row to the next. This is a little harder to do when working with a circle, but still achievable.
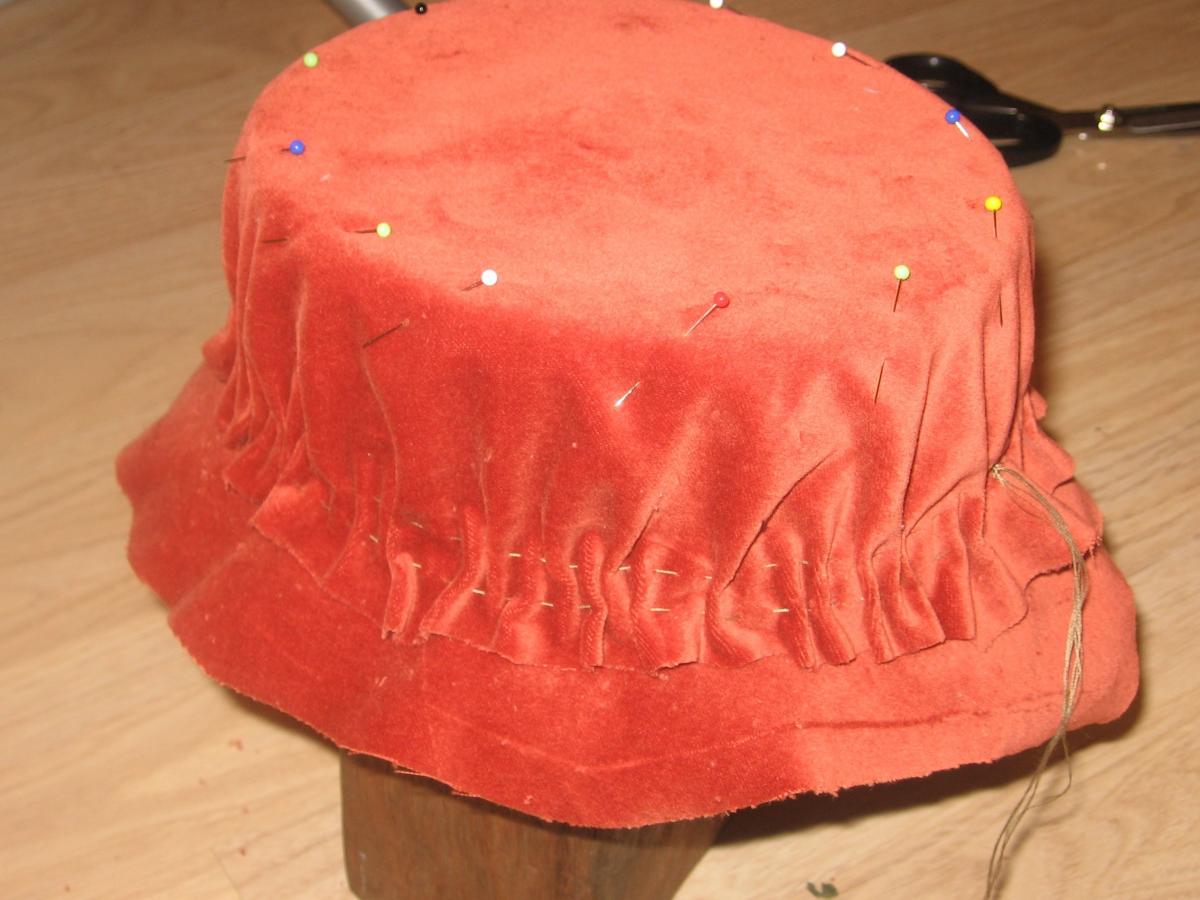
 Once the gathering threads were in place, I pulled them up carefully until the fabric was sitting over the hat base firmly, but not overly-tightly. I tied them off, then carefully worked my way around the hat ensuring that the gathers were evenly spread around it. It was at this point that I trimmed the circle down to allow just enough to turn under. I then pinned the turn up under, taking care to maintain the even gathers. This actually required me to readjust the gathers as I went around, as they did shift a bit while I turned and pinned.
 When I was happy with how it was all sitting, I stitched it in place using plenty of small, neat stitches that didn't show. This was especially important as I didn't have any thread that was even close to matching, so I continued using the khaki thread that camouflaged nicely.
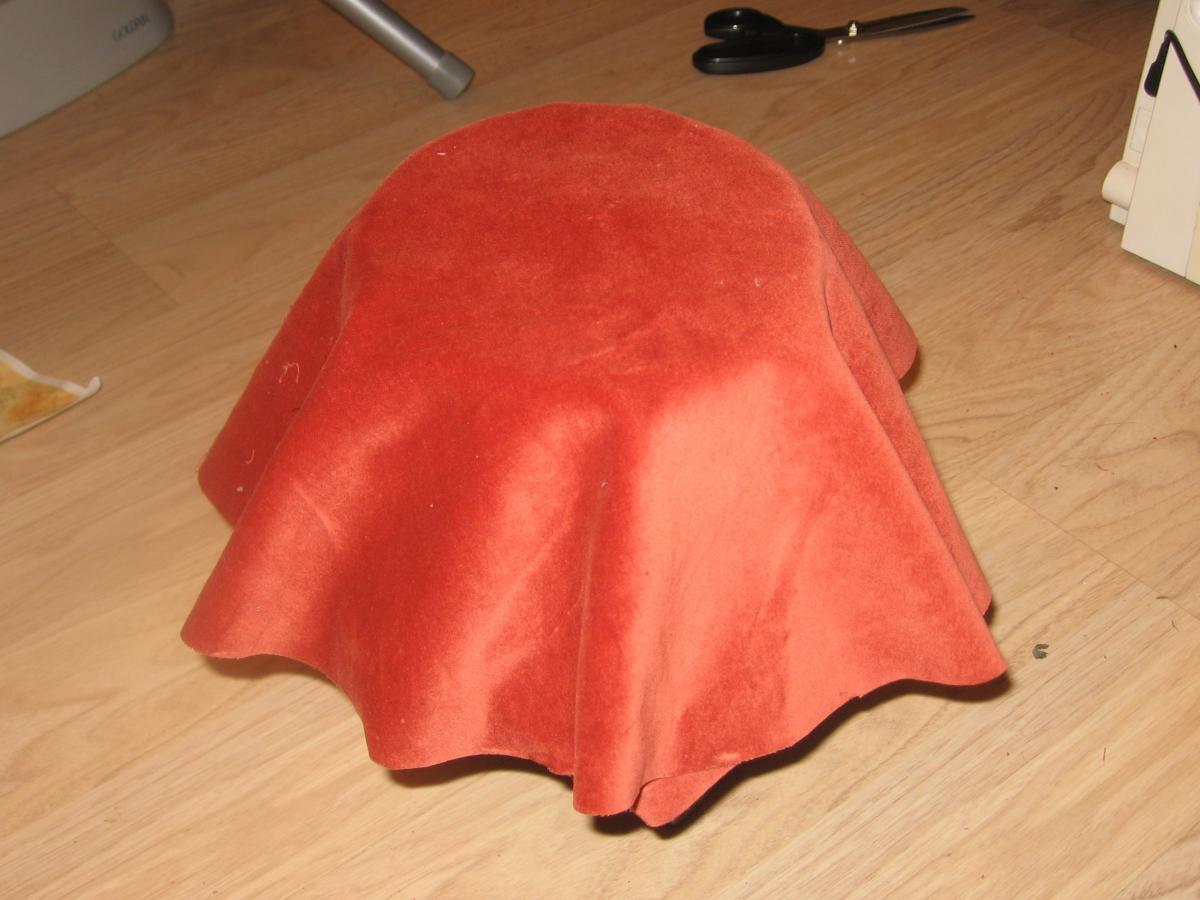
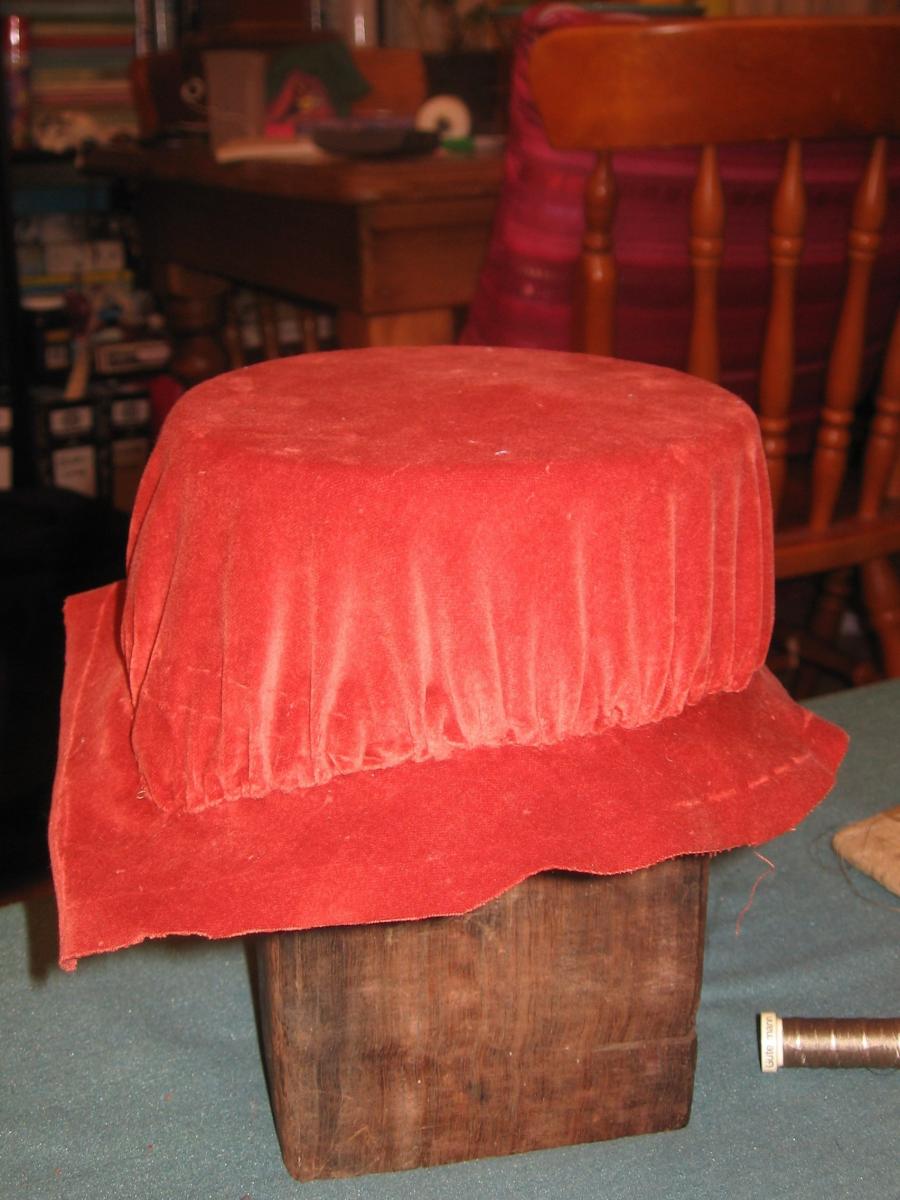
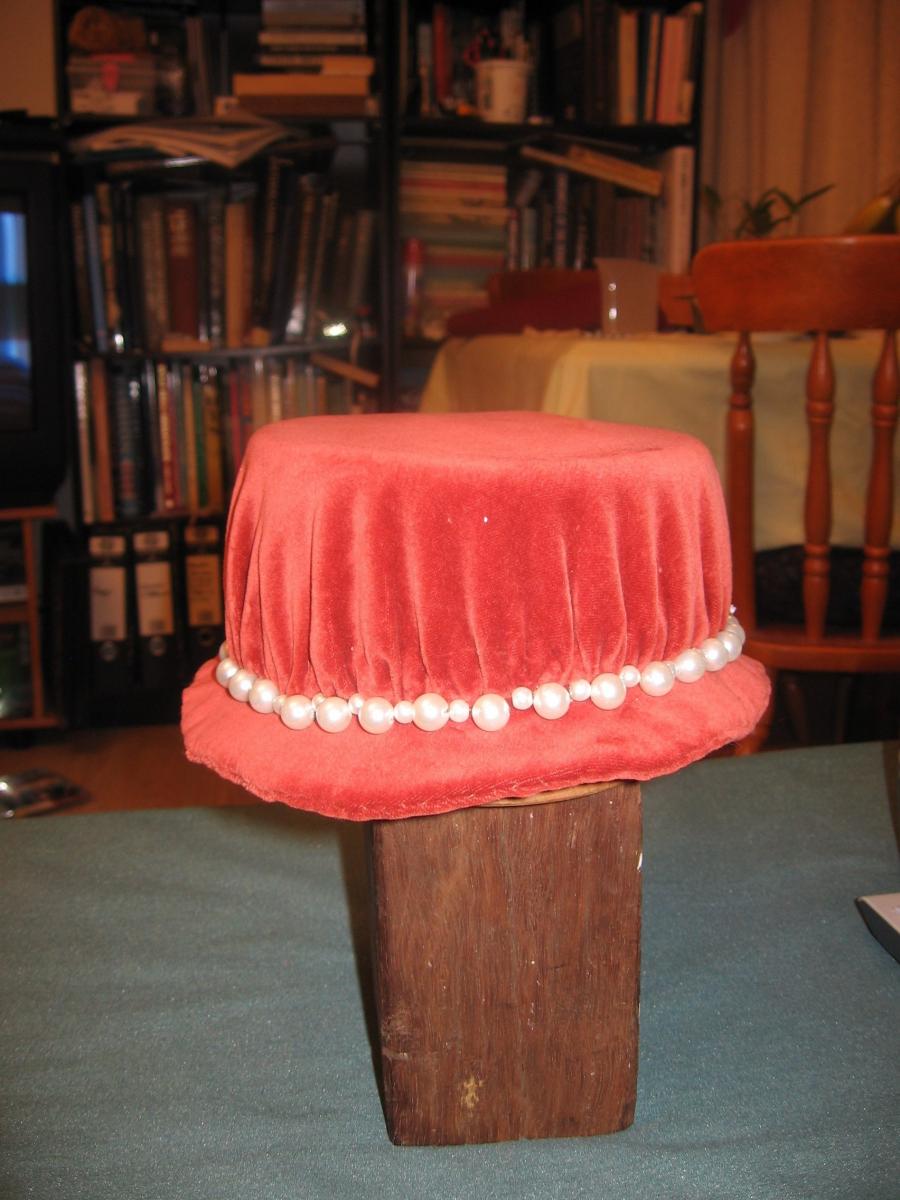
The moment of truth about whether I'd stitched it in place sufficiently came when I removed the gathering threads. This is always a moment when I pause to draw breath; I don't think it matters how long I've been doing this for, it's always going to be just a bit scary pulling away the gathering threads and finding out if it holds. As you can see from the picture, it held. You might also notice the slight impression that the stitches left on the velvet - this is normal, and tends to fade with time. Also, with a hat with the amount of decoration that mine was getting, it wasn't a point for concern.
I then attached the base of the brim, cunningly forgetting to take any photos of the process. It was essentially similar to that for my teeny tiny hat, except that in this case I first pinned under the two brim edges and stitched them in place, before snipping tabs in to fit the brim on the inside of the rim. However, the process didn't produce as clean a result as I would have liked around the rim this time - possibly because I was using a softer felt hood. I've been thinking about this since, and for the next hat I make I'm going to try putting the under brim piece over the top of the hat so that it's facing the upper brim right sides together, then stitch around the edges, before turning the under brim the right way out and securing it to the inside of the hat. I think with a somewhat-flexible felt base that this will work; I don't think it would work using a rigid base however as you wouldn't be able to get the brim turned under again unless it was a very narrow hat. 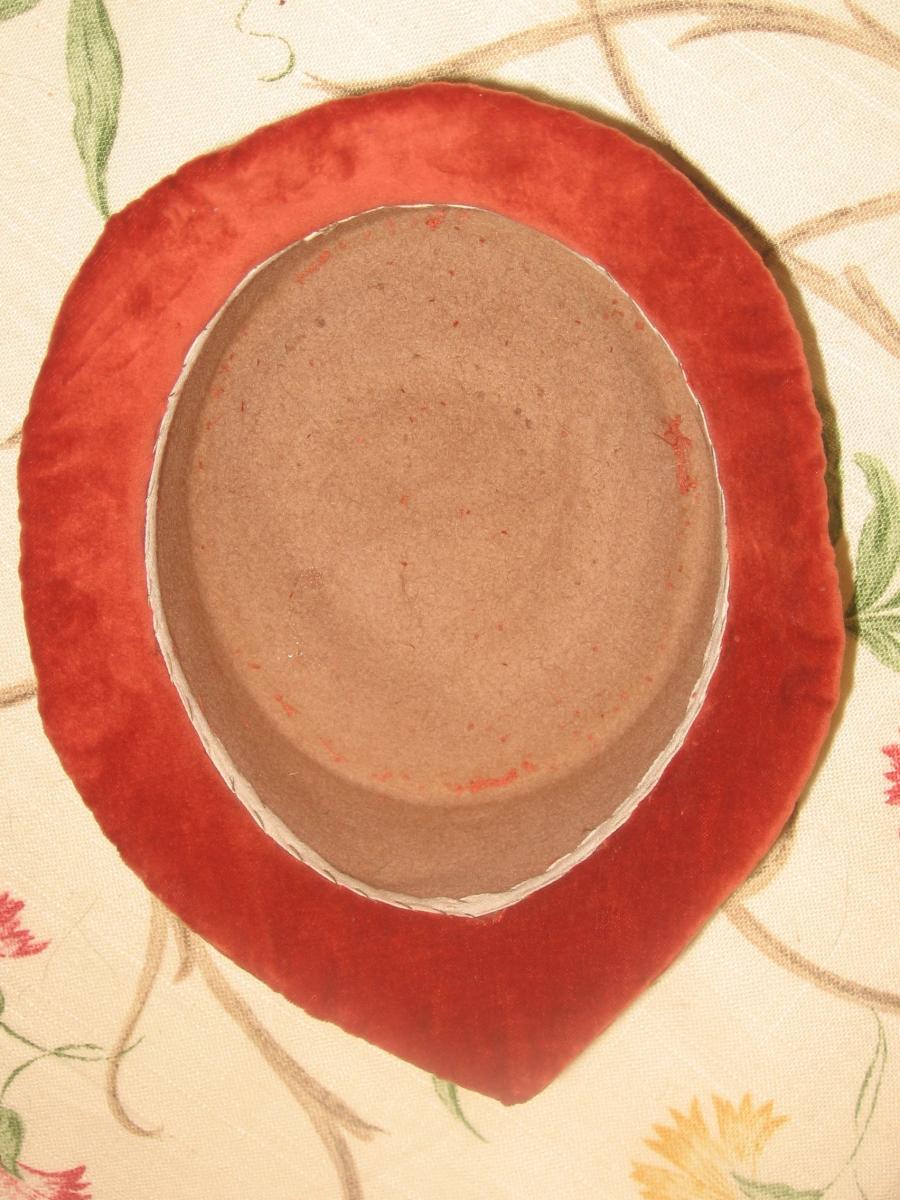
I secured the tabs on the inside, stitching them into place with a running stitch around the rim, then cutting the tabs down to an even height. I used a bit of narrow cotton tape to cover over the raw edges and tidy the whole lot up, whip stitching it onto the inside. I was quite pleased with how this turned out as it gave it a really nice finish.
One thing that you may notice in the photo on the left is that the right hand side of the brim has crumpled inward slightly. As I was working extensively with the hat, the blocking did soften over the duration - but a quick reblock with a bit more steam at the end of the entire thing brought it up beautifully again.
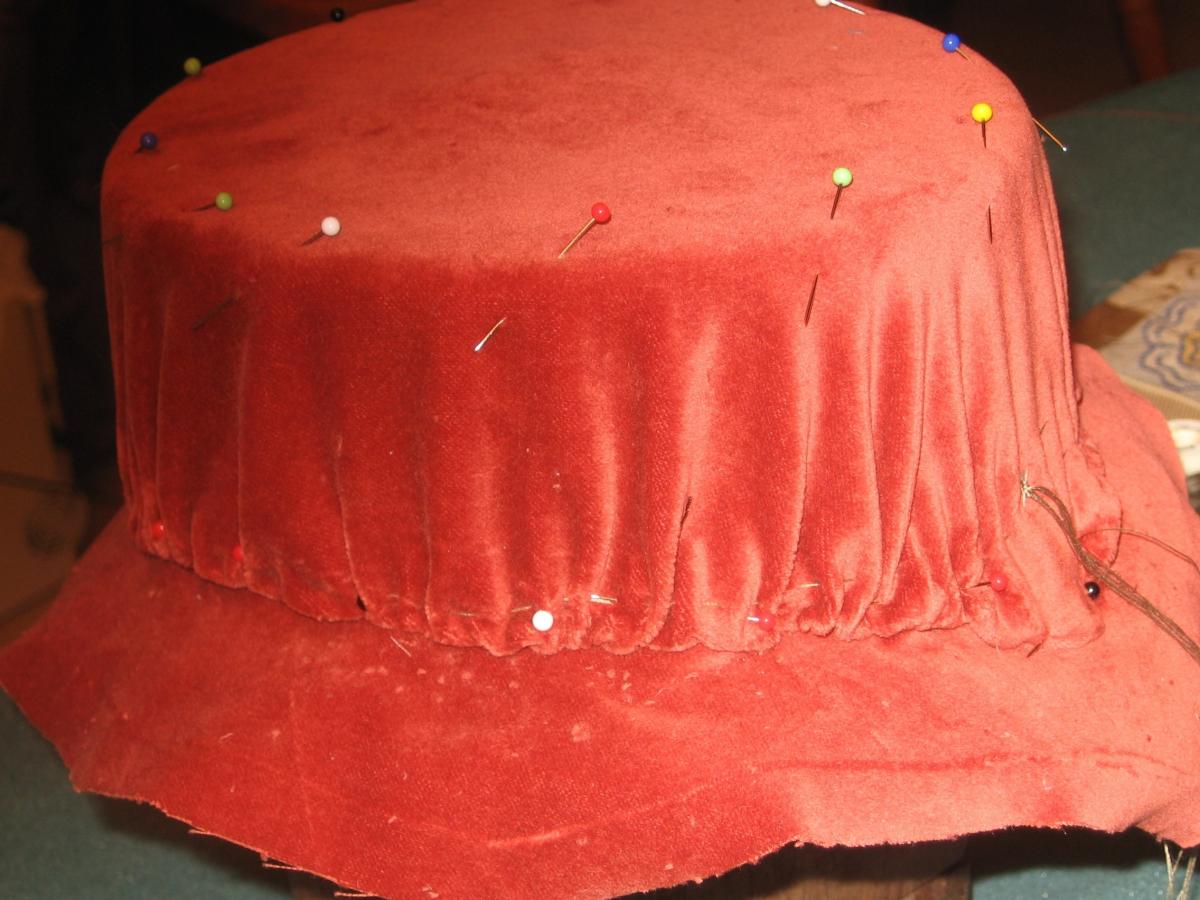
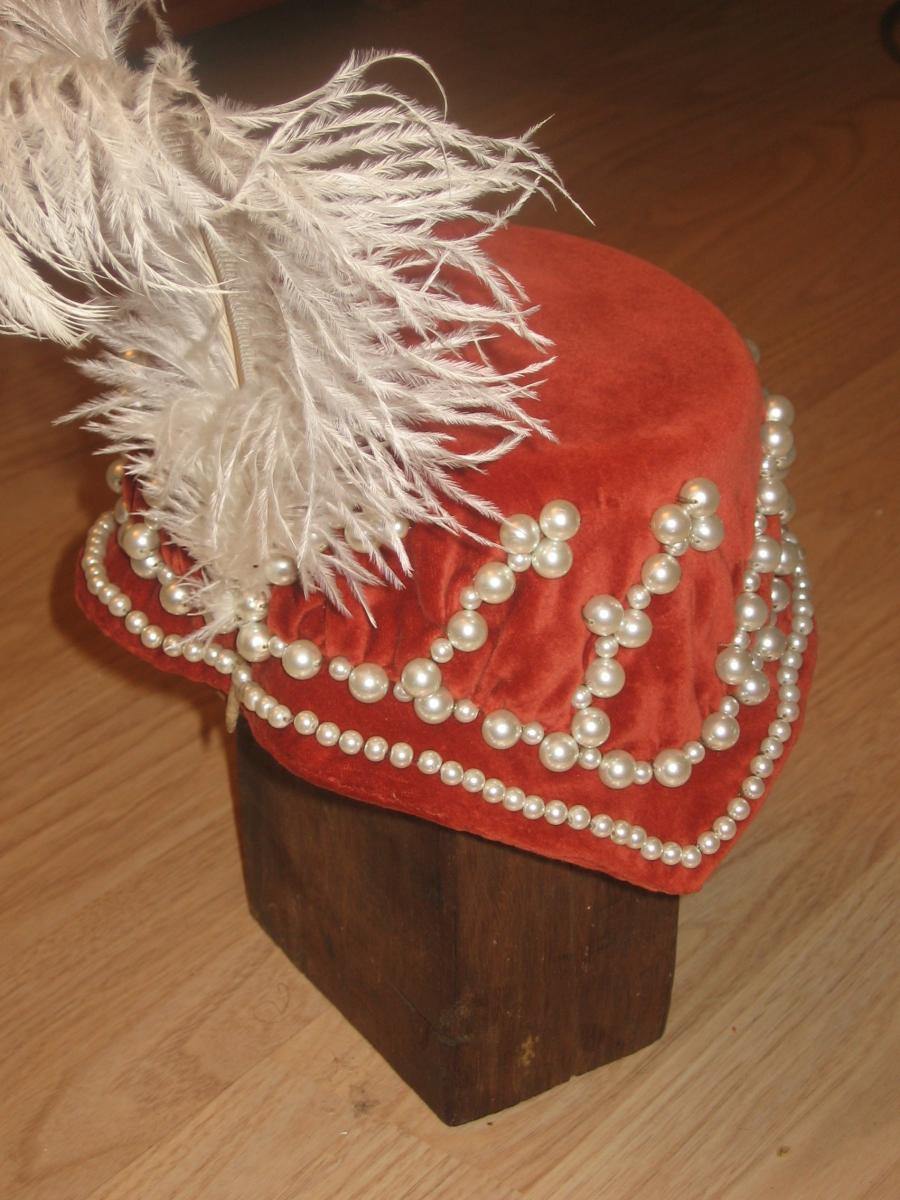
From here it was just a case of adding the pearls. I worked these row by row, starting with the line around base of the hat, then working the brim line and finally adding the "flowers". For each row, I worked from the centre front around, first doing one thread length's worth of pearls on the right hand side, then the same on the left, to ensure that my spacing was even. This meant that when I got to completing each row at the back, I was able to adjust the spacing so that it looked right and there were no obvious gaps or squishy points - but it also needed very little adjustment, because I'd taken care with my spacing.
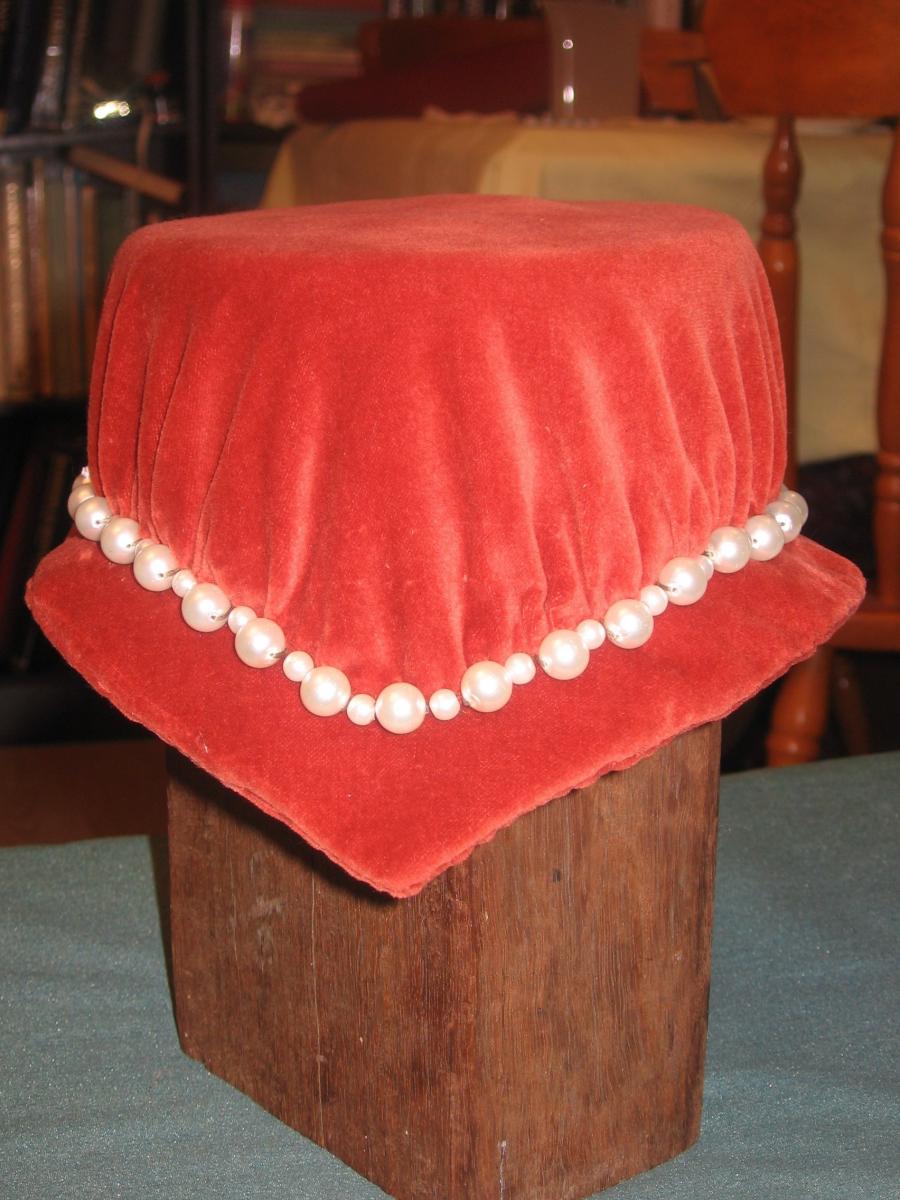 At right are two images of the first row of pearls. The back image shows you my big uh-oh moment. You remember earlier when I said I'd mention measuring again? So when I was drawing up the shape for the block, I only measured from centre front to centre back, and side to side, to ensure depth was even there. The rest I judged by eye. I'm normally pretty good at judging things by eye - but this was a new medium for me to work in, and I hadn't tried ironing felt to create shape before. As you can see, I screwed up. One of my Dad's army friends showed up at this point - Major Pissoff. I contemplated undoing the hat and fixing the mistake. However, to do that, I would have to have removed all the pearls and the entire fabric covering and reworked it - that would have been about 10-15 hours of work, down the drain! I decided that, as my first attempt at hat blocking, I could live with it. I also thought that the pearl flower things would help to disguise the unevenness. The reason I'm pointing this out is so that anyone reading this can learn from my mistake and not repeat this error. Seriously, learn from my mistake, lest Major Pissoff show up during your hat making venture also.
I've been thinking about this some more since then, and have come up with some new concepts that I'm going to try out on my next hat, to hopefully avoid repeating this mistake. Firstly, I'm going to measure equidistant points all the way around - not just at the middles. I think that this is something that I'll probably be able to judge by eye - at some point. At least until I've got the hang of working with felt and blocking hats, taking extra measurements seems like a reasonable option for circumventing this mistake. The second big change I'm planning on making, is using glass-headed pins to mark the brim line rather than a pencil. It's entirely possible that the error came from my fantastically lax habits of having multiple pencil lines where I've changed my mind, in varying weights to emphasise which line is more right this time. Pins should clear this up no end, and will also provide a mark-free way of noting the brim line for those occasions where I'm not then covering over the entire hat.
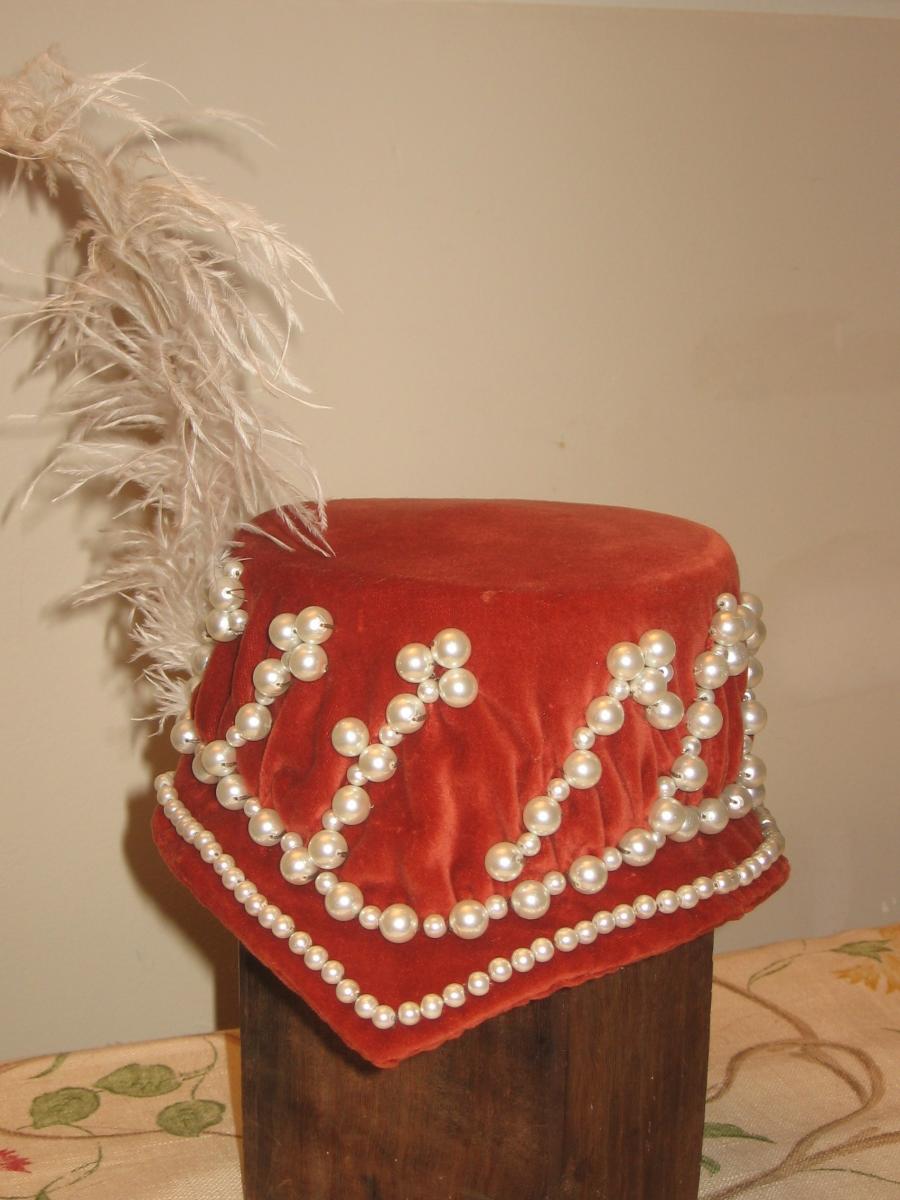
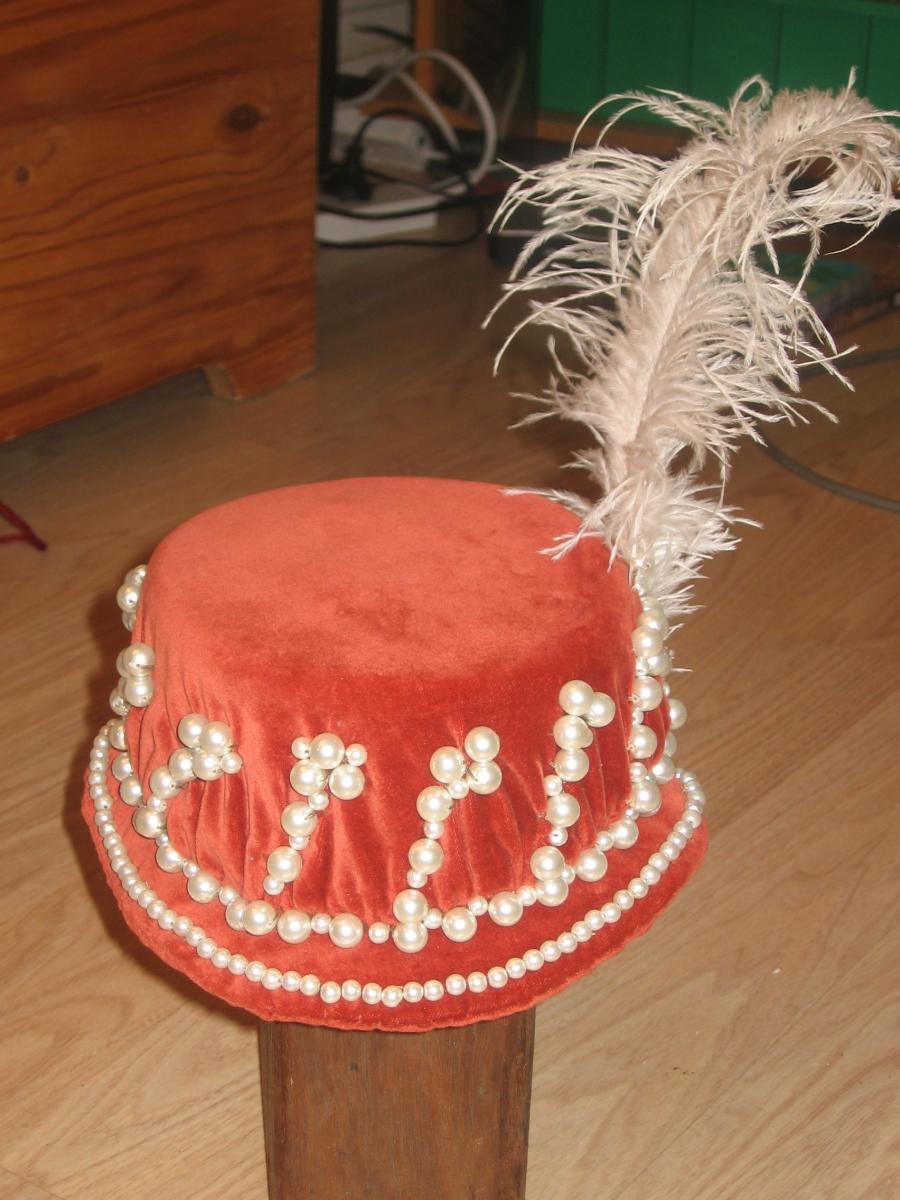
Having got over this hurdle in remarkably little time (only half a day, where screw ups like this can often result in a project being set aside for months if not years), I carried on with the application of pearls. As I had no suitable teardrop-shaped pearls to use at the centre front, I simply carried on the line of small pearls, which worked quite nicely. The pearl "flowers" were all judged by eye and based on those visible in the portrait I was using. The spacing of these came out pretty much spot on with what I wanted. While they don't fully hide the error at the back, they do help to mitigate it, as I had thought they would. The feather is just pinned in place with a large flower pin, so that I can take it off to more easily store the hat. These photos were all actually taken prior to attacking the hat with the steam iron again, to reinforce the shape.
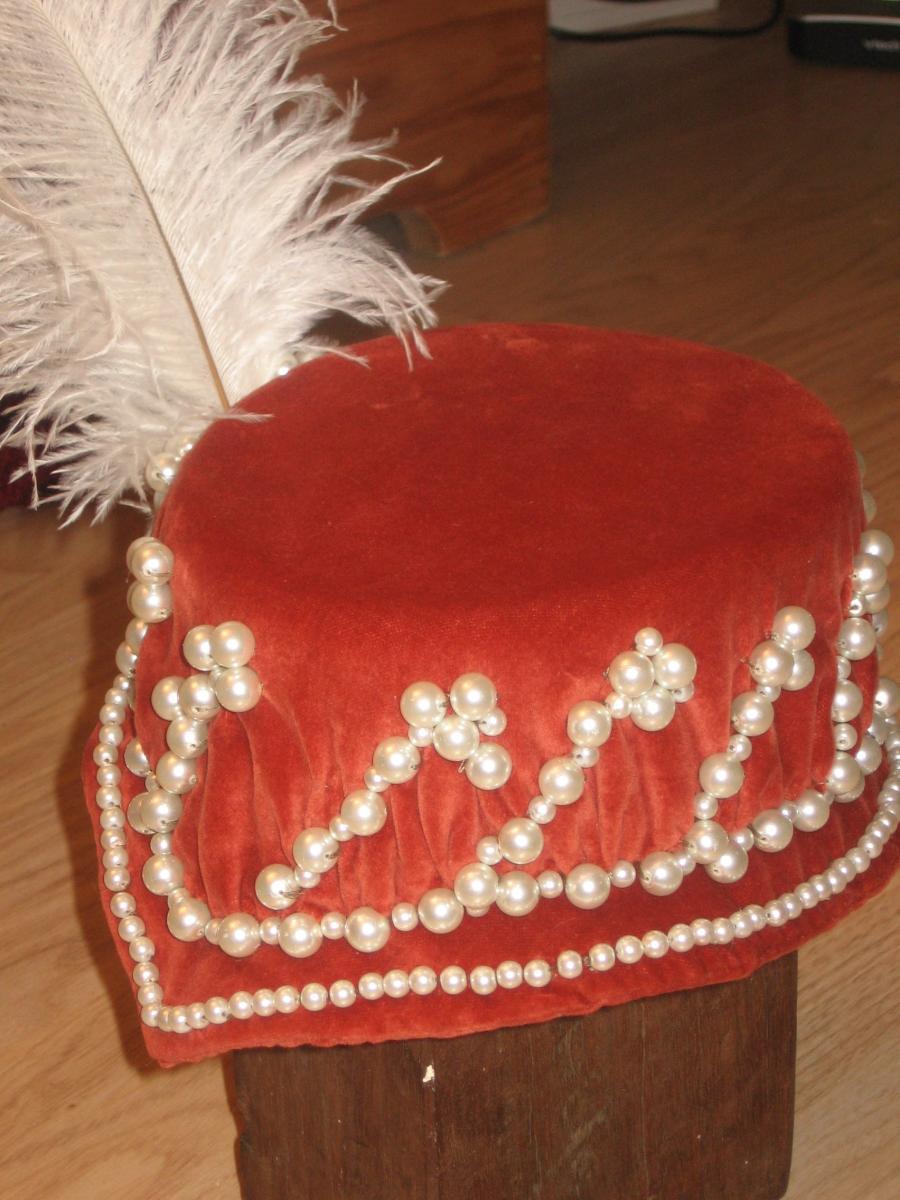
The beautiful thing about this project was how quick it was. I got the whole thing done, start to finish, inside a week. It only took about 20-30 hours, including sewing on all the pearls (and securing each one with multiple stitches), so it really was very fast. If you were just covering a hat and adding a premade hat band, or a smaller number of jewels, you could easily complete one in ten to fifteen hours.
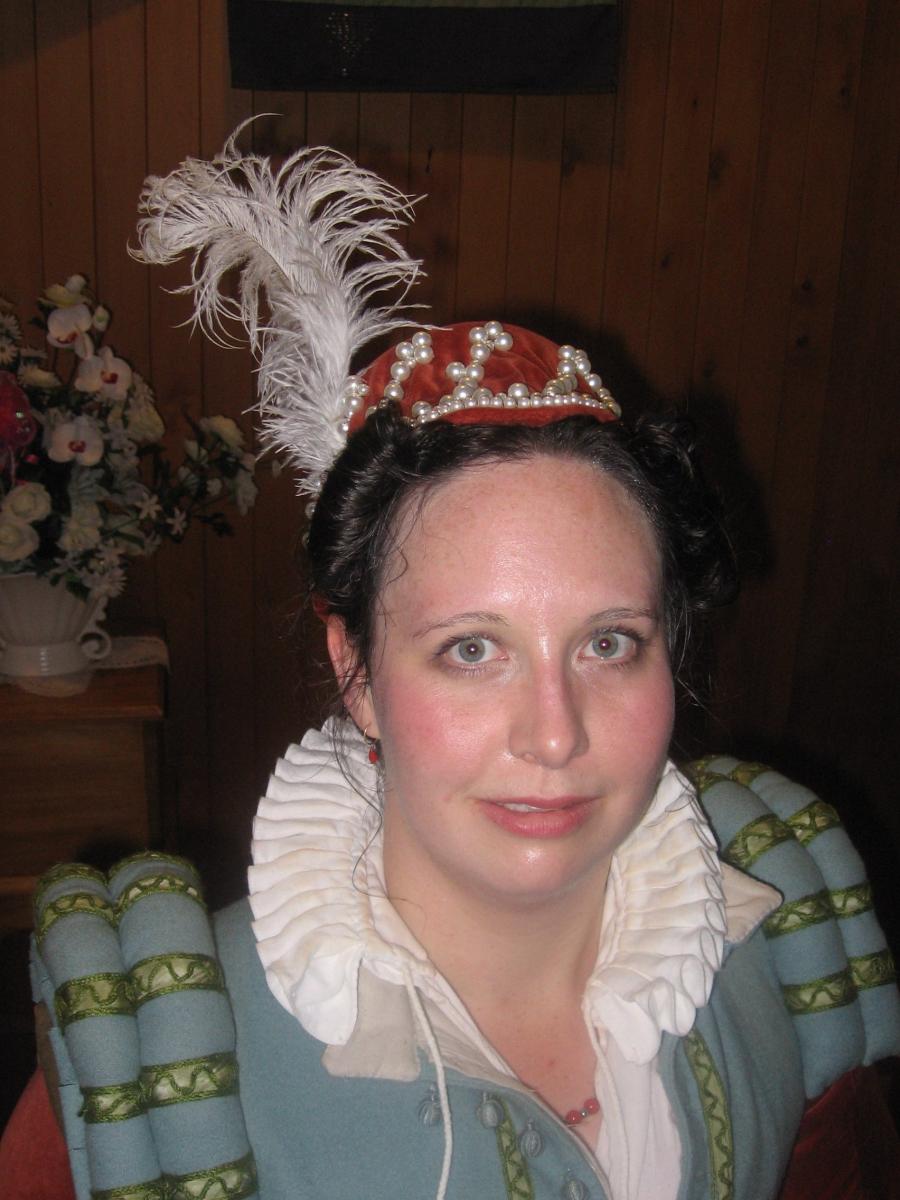
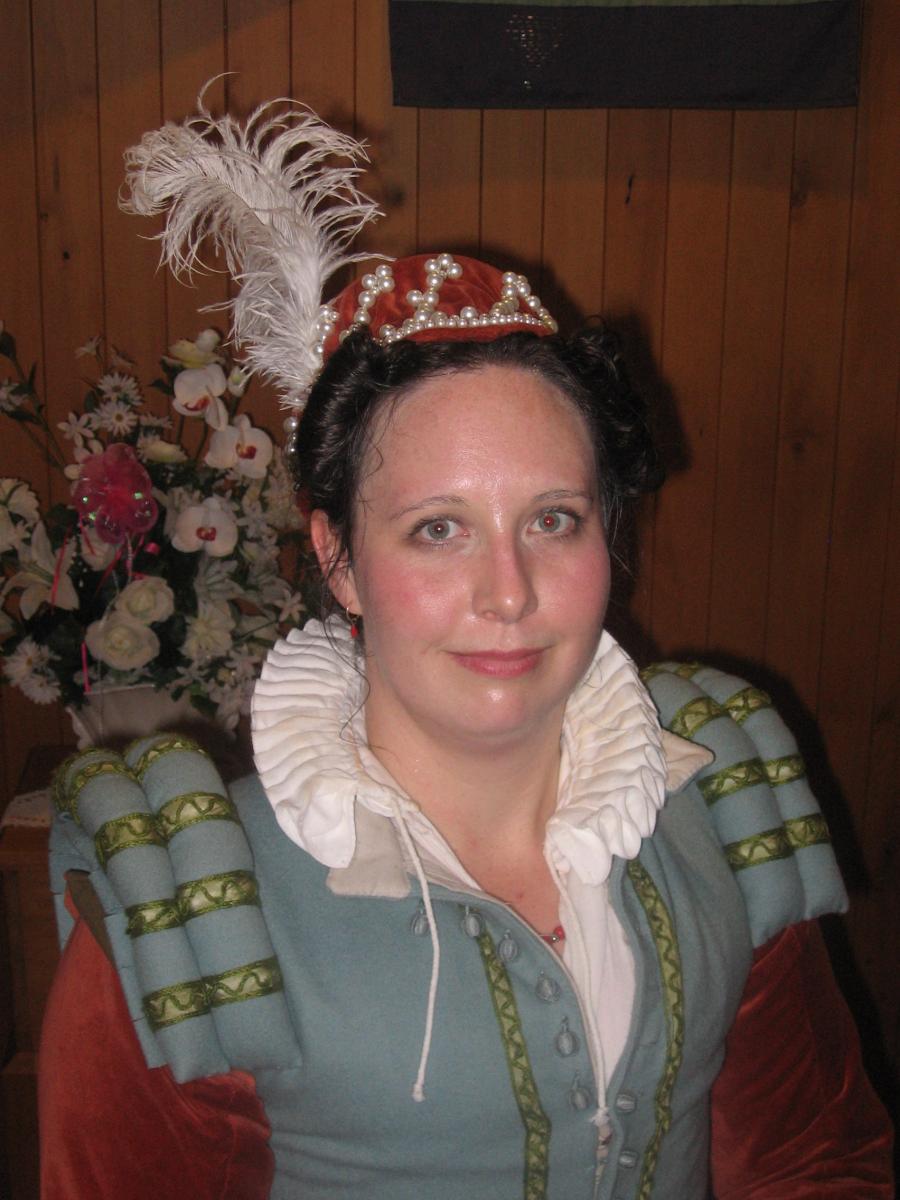
Most importantly, I got to wear it with my blue and orange French outfit to the ball - and it really did finish the outfit off beautifully. I'm very happy with my first attempt at actually blocking a hat, and also very pleased with how close it came out to the one in the original portrait. Now all I need to do is locate my hairspray so my hairdo actually stays put next time I wear it, and remember to get the photos at the start of the evening - not after three hours of dancing!
References
Arnold, Janet, Patterns of Fashion: The cut and construction of clothes for men and women c1560-1620 (California, Quite Specific Media, 1985)
Acknowledgements
My thanks to Lady Eleanor Hall for taking the images at the ball - she did a lovely job with the camera, as always.
- Log in to post comments
Unless otherwise stated, all work herein is done by Shannon Wanty, known in the SCA as Lady Vettoria Samaritana di Giovanni da Verona, formerly known as Lady Caterine de Vantier.
Got a question or a comment? Email me.

This work is licensed under a Creative Commons Attribution-NonCommercial 3.0 Unported License.