You are here
A Veiled Headdress
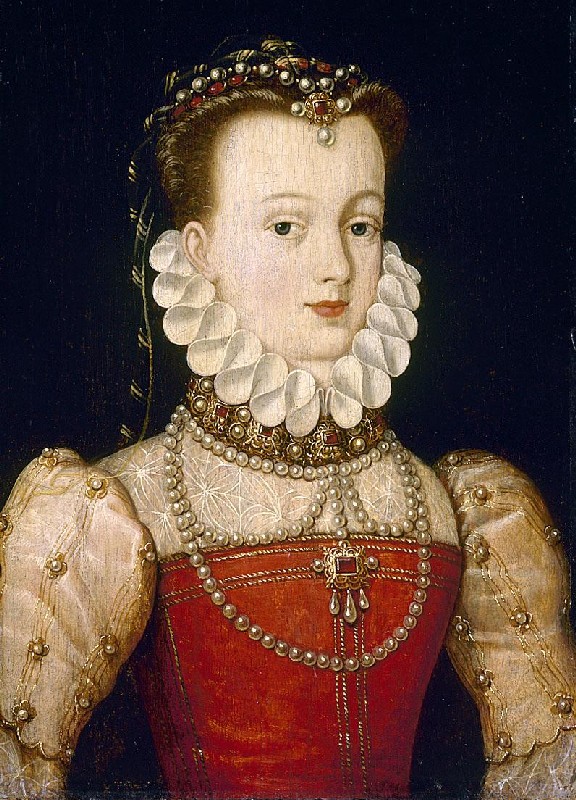
So I'd been looking at pictures of late period veiled French headdresses, to go with my posher garb. Eventually, I settled on basing one off the image below:
 [1]
[1]
The decision about which one to make was made extremely easy, as when I was looking through images and spotted this, I went "hey! I bought that fabric this morning!" Okay, so it's not an exact match, but it's a nice, lightweight silk organza with solid black and gold (lurex) stripes, pretty close and a good substitute. I also already had the pearls, and appropriate beads for in between the pearls. Some quick searching of TradeMe came up with the perfect ornament for the centre, but unfortunately the woman advertising it had her house written off in the earthquake and she was unable to go back in and get it. So I settled for something somewhat less than perfect, but still okay.
So onwards to the process, which was simple enough, and the reasons behind the decision-making....
From looking at the image carefully, I decided that the veil was probably attached to the row of pearls. There's a second row of oval red cabochons set in gold below the pearls, but the veil seems more inclined to follow the line of the pearls. It also looks a little as though the artist has painted the cabochons going over the veil at the centre, but then painted them out afterwards. Since the pearls sit in such a particular manner, I decided that they were most likely held on a wire. I used a relatively heavy gauge of wire, as I didn't want anything too flimsy or I'd break it (I'm rough on all of my things). I'm not a jeweller, so I'm not sure how they would have fixed the ends at the time. What I decided to do was to use crimping beads on each end, leaving loops where laces could be attached to tie it on around the base of my head. I also used crimping beads to help hold the centre jewel piece in place. The centre jewel originally had small brown glass bits dangling from it, which I replaced with potato-shaped pearls. To work out the length of the whole piece, I figured that the pearls probably continued down to around ear height, as this was about where the pleating on the veil ceased, so did a fair amount of holding it up and trying it on the match the length this way.
I was really pleased at this point, as the finished wired piece was naturally inclined to form a beautiful curve exactly like the one in the portrait, with no extra help from me.
And on to the veil itself....
First I had to wash the fabric. This was really important, as it was all lovely and poofy and I figured a wash would help decrease this. It did, although it is still inclined to poofiness. I think that over time, it will gradually settle down a little. Chances are, I'll dunk it for a wash a few more times as well, to try and encourage this.
One of the things that you might notice in the image is the stripes. When I started cutting out the veil, I did it from memory and not with the picture sitting in front of me. This meant I cut it out twice, firstly with the stripes designed to hang vertically, and secondly with them designed to hang the correct way when I went back to look at the image to check the pleating. Hopefully I've now learnt something from this.
Having hemmed the veil, I started tacking on a narrow gold cord down the sides. Looking at the texture of the cord in the images, I decided that it looked most likely to be a plied cord, rather than a fingerloop braid. Being unable to see the back of the veil, I had to make a decision about whether the cord continued all the way around, or just went down the sides. Observing the poofiness of the silk, and figuring that the lady in the picture was probably faced with a similar issue (although maybe to a lesser extent, depending on the exact fabric weave, and possibly the use of real metal threads would have added extra weight also and thus disinclined it to poofiness), I decided that the cord was likely to continue all the way around, as this would add weight and encourage the fabric to sit down a little more.
Veil piece all prepared, it was now a matter of pleating it and fitting it to the wired piece. I spent ages deciding how many pleats I thought there were, and the exact spacing of them. I've since come to two opposing conclusions. The first is that I should have made the veil about 10-15cm wider, so that more fabric could be incorporated into the pleats. The second is that less fabric would have meant less poofiness, but then I really wouldn't have had enough to go into the pleats and it would have therefore been less true to the image. I decided to try using roll pleats, as from the way the fabric drapes and unfurls I thought that these would be appropriate. And I figured if it wasn't looking right I could always redo it with different pleats. However, the roll pleats worked beautifully, and inclined the fabric to unfurl as it does in the image. Once the pleats were in place, I whip stitched it onto the wired part in between the pearls and silver beads. I had to be a bit careful not to do this too tightly as it skewed the fabric strangely if I did.
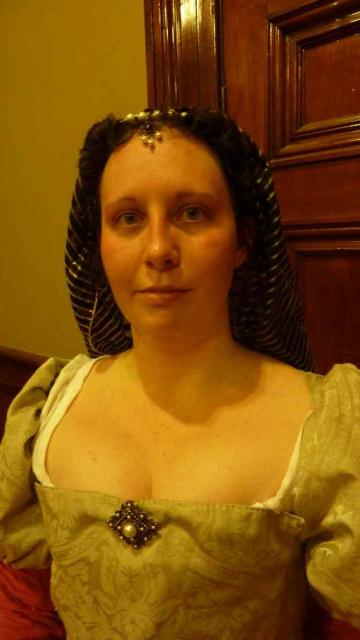
The end result looked quite a lot like the picture. It is a bit poofier, but I think this is because of the things mentioned above. I can get it to sit as it does in the portrait, but this lasts for approximately two seconds until I move - so it's possible that the lady in the image had the same issues, but her veil is painted at its most perfect here. One of the hazards of this type of headdress that I have discovered is that you have to put it on right first time. Otherwise, what happens is that the central jewel gets stuck on your hair, and when you go to take it off, it tugs and pulls, and is inclined to put your carefully styled hair into disarray, which is an absolute pain to deal with. On the plus side, it means more practice at putting the rolls in, but still.... The image below is from the first time I wore it. As you can see, I'm wearing it placed too high on my head - but this was the point at which I found out about how careful you need to be when putting it on. Oh well - practice makes perfect!
Overall, I was quite pleased with the finished headdress. I intend of course to try others of different styles, so hopefully as I do I will learn more about their construction, and this may lead me to revisit this one. But in the meantime, I have a headdress that I'm very happy to wear.
[1] From French Renaissance Costume
I have used images that are in the public forum, or that I have asked permission to use. If you think you own the copyright to these images or think that I'm using them in a way that is not allowed, however, please get in touch with me.
- Log in to post comments
Unless otherwise stated, all work herein is done by Shannon Wanty, known in the SCA as Lady Vettoria Samaritana di Giovanni da Verona, formerly known as Lady Caterine de Vantier.
Got a question or a comment? Email me.

This work is licensed under a Creative Commons Attribution-NonCommercial 3.0 Unported License.