You are here
A Teeny Tiny Hat
I had been wanting to have a go at making hats for a while, and thought that the easiest way to begin would be to buy a cheap hat from a variety store, pull it apart, and recover it. Not especially accurate in construction, but hopefully quick and fun, and a good way of building my confidence for more ambitious undertakings.
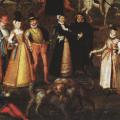
Then I came across the image below (Joris Hofnagel's Fete at Bermondsey of c.1569), and quite quickly my heart was set on creating a very silly, very small hat. Why? Well really, why not?
 [1]
[1]
Take a close look at the group of men and women in the bottom left hand corner of the image, and you'll notice that the women on the left and right of the group are wearing some really rather small hats - the black one on the right is unfortunately a little harder to see given the black skirt of the lady on the horse behind her. But, how cool are they? What's even more cool is that they appear to be slightly different shapes from each other - one is rounder and shorter, the other is slightly taller and quite narrow in diameter.
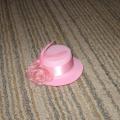
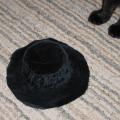
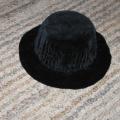
So, with great excitement I went out and bought myself one of the rather ridiculous little hats that the $2 stores sell, a lot like the one below (but not that one because it was given to me by a friend).
The first thing I did was pull all the crap off it. Or, if you want to be fancy about it (or induce giggles in 12 year olds), I denuded it. I had a quick hunt through the fabric stash, leaving the entirety of the stash on the floor in my wake, and came across some remnants of cotton velvet that I thought would work well for this. Clearly, if one can afford a rather ridiculously silly little hat, one can afford velvet.
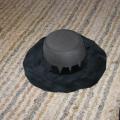
My method was extremely modern. Well, I was starting with a modern hat base after all. First, I cut a circle of velvet out that was large enough to cover the top side of the hat room, leaving a little more in the centre that could be cut into tabs to go up the side of the hat. I cunningly glued this all in place using some nice strong Craft Glue.
Then, I cut a circle of velvet that was plenty big enough to cover the top and sides of the hat. I decided I wanted to give it a pleated effect around the sides, as I had seen this on many, many larger 16th century hats and thought it looked quite cool. So I ran a few rows of gathering threads around the edge of the circle, taking care to line them up with one another. This was a little bit tricky because the stitches had to get wider the further from the centre they were. Having accomplished this, I again used craft glue to stick the centre to the top of the hat.
After this, I pulled all the stitches tight (holding onto all the threads at once), so that the fabric came in around the sides of the hat. This was followed by a large amount of faffing around (yes, that's a technical term) to get the pleats sitting evenly.
When I was satisfied that the pleats were sitting evenly, I tucked under the raw edge at the base, pinned it in place, and carefully stitched it down - making sure to join it to the fabric covering the rim in the process.
Then I added another piece of velvet to the underside of the rim, the same way I had for the topside. This was followed by a little more faffing as I tucked the raw edges of both topside and underside in, on the underside edge of the rim, and stitched all around with ladder stitch (teddy bear stitch, by another name).
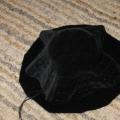
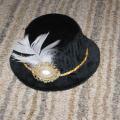
If I wanted to at this point, I could have added a lining to the hat to neaten it up. But I'm lazy and it was a prototype, for bigger, better things (well okay, so I immediately went and made another, smaller hat - but still...), so I didn't. Instead, I finished it off by decorating it with some cheerful yellow fingerloop braid I'd made during a brief spurt of interest in that area, a fake pearl cabochon earring, and a jaunty wee feather (cut down from a slightly bigger feather to be in better proportion to the hat). And voila! A silly little hat!
I have used images that are in the public forum, or that I have asked permission to use. If you think you own the copyright to these images or think that I'm using them in a way that is not allowed, however, please get in touch with me.
- Log in to post comments
